Self-hosting Supabase is quite a task on its own, but when it comes to running it behind a reverse proxy, things can get even trickier. In this guide, I’ll show you how I self-host Supabase with Docker and Caddy as a reverse proxy running on a Hetzner Cloud VPS.

The Approach
The idea is to run the Supabase stack behind Caddy. This way, we can have a single entry point for all our services and let Caddy manage our SSL certificates automatically. One of the requirements is to have other services running on the same VPS, which is why we need Caddy as a reverse proxy.
Here’s a high-level overview of the setup:
- VPS: We’ll use a Hetzner Cloud VPS running Ubuntu with Docker.
- Supabase: This will be our backend as a service, running in a Docker Compose stack.
- Caddy: Our reverse proxy will be running in a separate Docker Compose stack. It handles SSL certificates and routes traffic to our indidual services.
- App Service: This is our custom application running also in a Docker Compose stack.
- Shared Network: All services will be running on the same Docker network to communicate with each other.
- Firewall: We’ll configure the firewall to only allow HTTP and HTTPS traffic going to Caddy, not the Supabase services directly.
Hetzner Cloud VPS
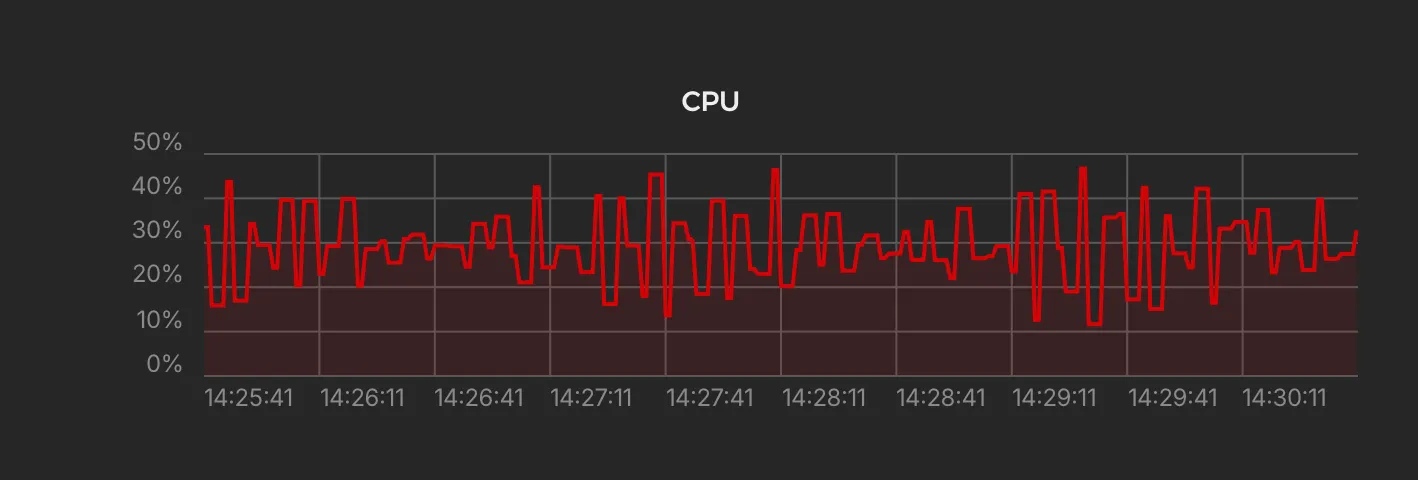
For this experiment I created a Hetzner Cloud VPS of type CAX11, which is the cheapest option they have. You might want to upgrade this for your production setup, since the idle Supabase stack with no traffic hitting it all already consumes around 30-40% of the CPU.

Supabase Setup
Follow the official Self-Hosting Guide to set up Supabase on your VPS. You can find the guide here.
The Supabase Studio should now already be reachable on your VPS on port 8000. We will deal with this later.
Caddy Setup
Caddy will be our reverse proxy, handling SSL certificates and routing traffic to our services. We will run Caddy in a separate Docker Compose stack. Here’s the docker-compose.yml file:
services:  caddy:    image: caddy:2    restart: unless-stopped    cap_add:      - NET_ADMIN    ports:      - "80:80"      - "443:443"      - "443:443/udp"    volumes:      - $PWD/Caddyfile:/etc/caddy/Caddyfile      - caddy_data:/data      - caddy_config:/config    networks:      - proxy-network
volumes:  caddy_data:  caddy_config:
networks:  proxy-network:    name: proxy-network    external: true
There are two things here that are important:
- Mount the
Caddyfileright next to thedocker-compose.ymlfile. This file will contain the configuration for Caddy. - Create an external/shared Docker network called
proxy-networkthat all services will be part of.
Caddyfile
Let’s create the Caddyfile next to the docker-compose.yml file:
# Caddyfileapp.flori.cloud {    reverse_proxy app:80}
supabase.flori.cloud {    reverse_proxy supabase-kong:8000}
In the Caddyfile we have seperate domains pointing to our different services. The app service is our custom application, and supabase-kong is the name of the Supabase entrypoint and basically a reverse proxy on its own.
So whenever a request comes in for app.flori.cloud, Caddy will route it to the app service on port 80. The same goes for supabase.flori.cloud and the supabase-kong service on port 8000.
Since Caddy does automatic SSL certificate management, you don’t have to worry about that. When I hit https://supabase.flori.cloud for the first time, Caddy had already issued a Let’s Encrypt certificate for it.
Shared Network
As you can see above we are routing traffic to app and supabase-kong. These are the service names in the involved Compose stacks and get resolved by Docker itself. To make this work, we need to have all services in the same Docker network. This is why we created the proxy-network network in the Caddy’s docker-compose.yml file.
networks: proxy-network: name: proxy-network external: trueBut, there’s an issue with this. Since we have started Supabase as a standalone stack with default configurations, it will create its own network. We need to attach the Supabase Kong service to the proxy-network network:
docker network connect proxy-network supabase-kongDocker Compose Override
First I thought a good apprach would be to use a docker-compose.override.yml file to attach the Supabase Kong service to the proxy-network network by default. But this didn’t work as expected, since it messed up the original network configuration of the Supabase stack and didn’t get merged as I was hoping.
Firewall
As mentioned earlier, the Supabase services are still reachable on their ports directly. In order to prevent this, we need to configure the firewall to only allow HTTP and HTTPS traffic going to Caddy and close all other ports.
In my case I created a new firewall profile in the Hetzner Cloud Console and added the rules accordingly. But you can also use ufw or something similiar to achieve this. Just make sure to only allow TCP traffic on ports 80 and 443 to your VPS.
Other Issues
While setting up the Supabase stack I ran into a few other issues that I had to solve. At first I started the whole stack with the pre-defined passwords and secrets and then changed them later on.
This lead to an issue where the analytics service was not able to start up anymore:
Postgrex.Protocol (#PID<0.163.0>) failed to connect: ** (Postgrex.Error) FATAL 28P01 (invalid_password) password authentication failed for user "supabase_admin"I found a solution in the Supabase GitHub issues where you have to delete the db/data folder and restart the stack.
rm -rf volumes/db/dataConclusion
Self-hosting Supabase with Docker and Caddy as a reverse proxy is a really nice approach and works quite well (mainly because Caddy is just great). The key is to run all services on the same Docker network and configure the firewall to only allow traffic to Caddy.